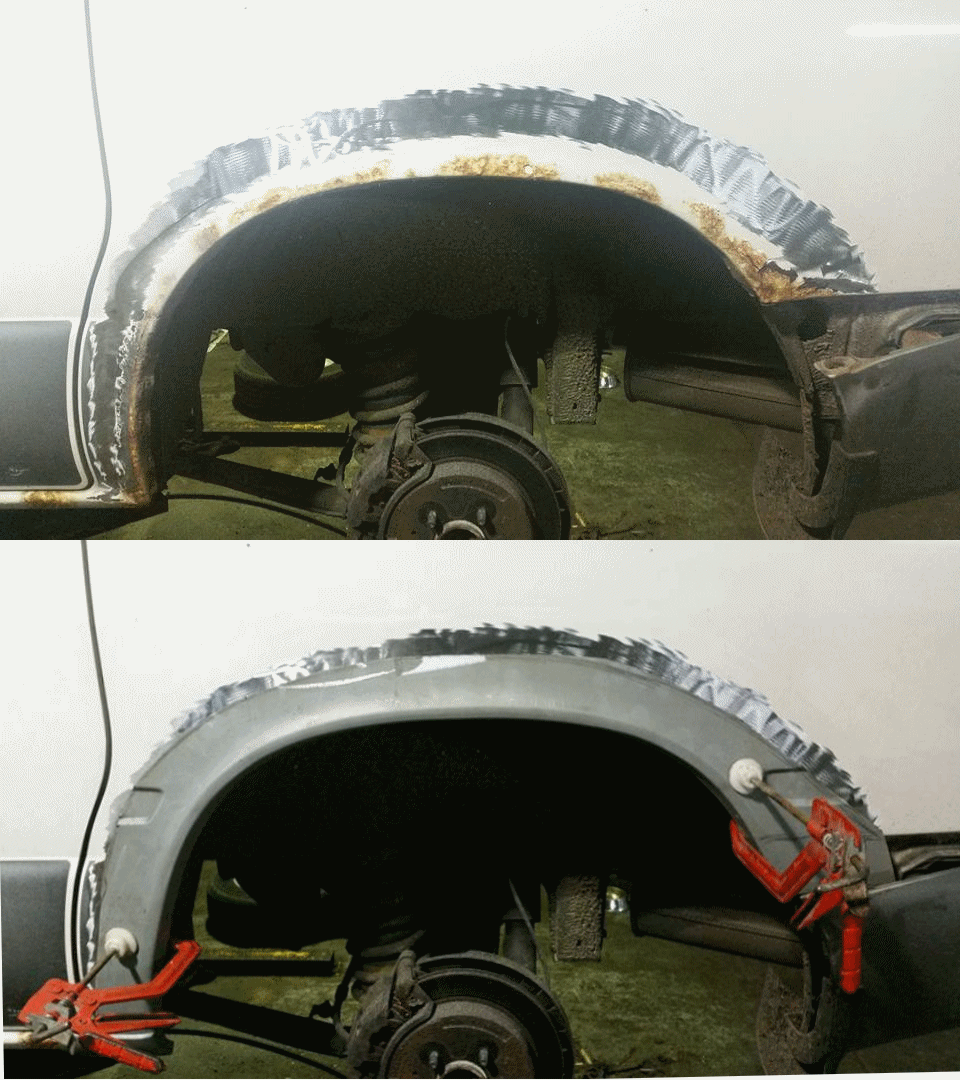
Steel arrived so I cut my teeth on the OS rear "ventilator panel just behind the rear arch.
I have left "tags" at the top and bottom of the repair as I may need a bit extra here when I come to replacing the arches.
This was a simple job here and uses 20 SWG steel with a bit of 18 SWG on the inner arch area.
https://goo.gl/photos/oZv5BjRTg3Dag54s7
There is still some work to to this area notably the corrosion that has gone through to a hole underneath the OS rear bumper bracket. This brackets quite a structure and not something that can be removed to gain access like the NS can. I will repair this one top down through an opening in the rear slam panel, the bit that holds the lock staple, and there is a small hole in the trumpet on this side too but nothing extensive unlike the NS.
The other side was not so straightforward
https://goo.gl/photos/ttG7LNCqgje6kvGZ7
So... dog rabbit...rabbit dog
First the cutting out.
You can see that the floor slam panel needed to be opened to get access to the inner box of the rear X member. The outer skin of the cross member is 18SWG and the inner reinforcing is 16 SWG. The inner reinforcement is a u channel that runs through to the trumpet beneath the D pillar and secures the rear bumper bracket also. The two horizontal ears or tags on the bumper bracket weld to the 18 SWG but the lowers spot weld through to the 16SWG forming a laminate That directly connects it to the chassis longeron.
https://goo.gl/photos/EA9BPazTEXHH7m6QA
These images are a bit confusing but as I cannot upload the images just the links you will have to stand on yer ed for a couple of them. They show the trumpet and rusted box sections that had to be removed.some are shot from underneath looking out to the NS and the others to the OS. The mucky treacle is Fertan.
https://goo.gl/photos/jhUUDGkQiWqeNV8M8
This is the area after it has been cleared and cleaned up. You can see the number of panels that converge in this area 7 in all.It makes for a very strong structure and it differs from the OS.
So having welded in a couple of skirting panels the cleared area was treated with Fertan and then zinced ready to start getting some strength back in the structure.
https://goo.gl/photos/xzcitkSUB6Dy4eJ67
The OE material that is formed into the semi conical panel is 16SWG.
I tried to replicate the shape. It was designed that way to take the substantial twisting that is going on in that corner, imagine a heavy top being thrown into a corner at speed on a narrow bus like ours and you can get an idea of the twisting and flexing that must be going on here. Anyway it was not a success and I went through three different approaches before I decided that the best solution would be to fabricate the piece in three curved sections and then reinforce the areas it joined the cross member at and strengthen the floor above also.
The spine was edge welded then three weld fillets were laid over this and the same repeated on the inside.The third section was a curved flat section edge welded to the top from the inside a inch tacked from under neath to form a flange that would be plug welded to the reinforcement of the floor above.
https://goo.gl/photos/cN69Xaw2Qujprbx98
The cross member inner sections were renewed and the chassis boxed off at the end where it will meet the new "cone". The cone was fitted and mig plug welded through the Inner support channel and welded around the outer underside also.
https://goo.gl/photos/JvobcUYThgMPK2c57
Area zinced and ready for sealer and schutz when I have fixed the vent panel. In one of the shots you will see the closing panel that forms the cover over the inner reinforcement. That will be plug welded after I finish the floor strengthening in that corner and then the iron can be fitted back and plug welded through all the panels before the slam panel is refitted.
https://goo.gl/photos/VKYbr1NRL4zuEqwGA
I hope that lot makes some sort of sense!

