Page 1 of 1
Fitting instructions for Thule 973 bike rack
Posted: Tue Mar 08, 2011 11:38 pm
by leecrease
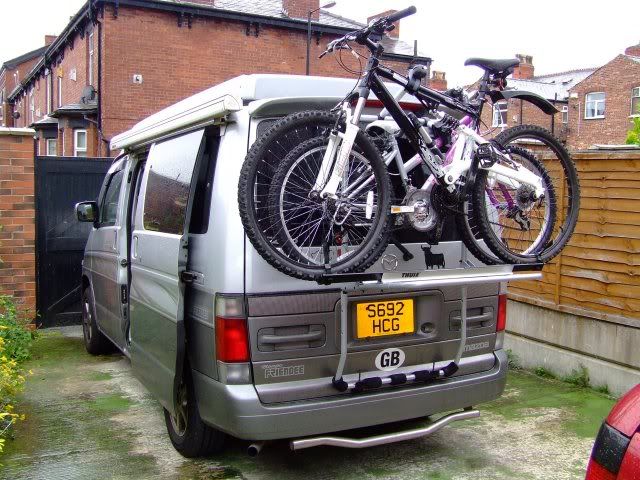
Hi. Does any one have bolt settings to fit Thule 973 bike rack to 2000 new shape bongo with tailgate spoiler. I have fitting pack 18. Any help appreciated as there are a lot of bolt settings which are not listed for bongo.
Regards
Lee
Re: Fitting instructions for Thule 973 bike rack
Posted: Wed Mar 09, 2011 5:14 am
by Muzorewa
Re: Fitting instructions for Thule 973 bike rack
Posted: Wed Mar 09, 2011 9:37 am
by leecrease
Thanks for the pictures, do you know which bolt settings you used. Regards
Re: Fitting instructions for Thule 973 bike rack
Posted: Wed Mar 09, 2011 9:43 am
by Muzorewa
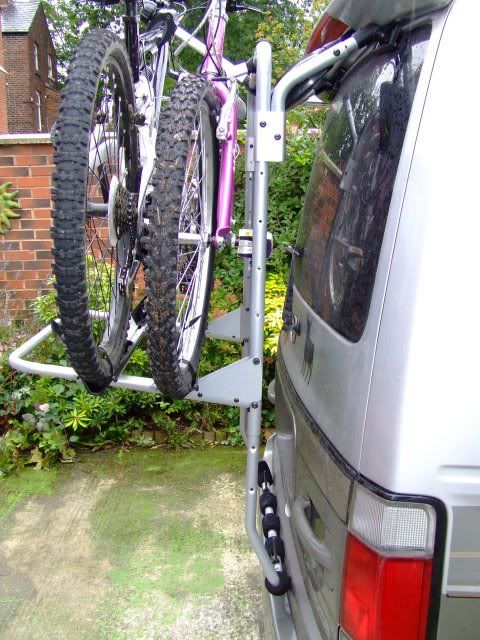
I don't think it follows any of the models precisely, the 973-02 is for the Vectra, Wagon R, Golf, Passat and the bigger Volvos. If you look at the photos you'll be able to figure out which holes to use.
Re: Fitting instructions for Thule 973 bike rack
Posted: Wed Mar 09, 2011 10:06 am
by bongomac
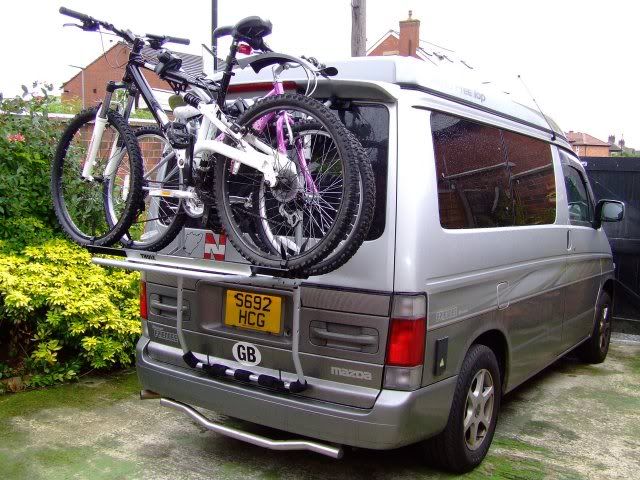
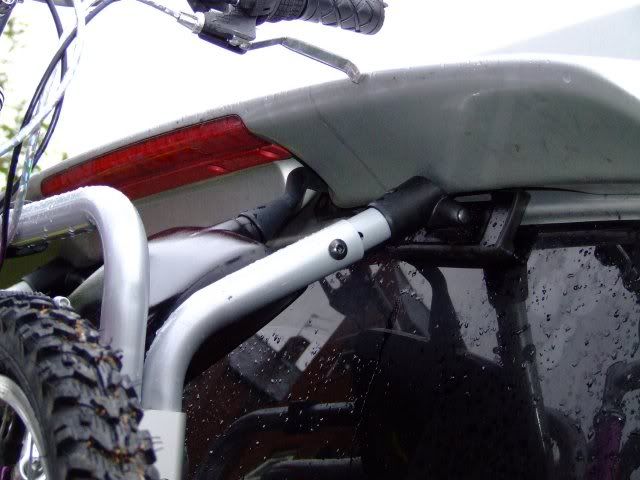
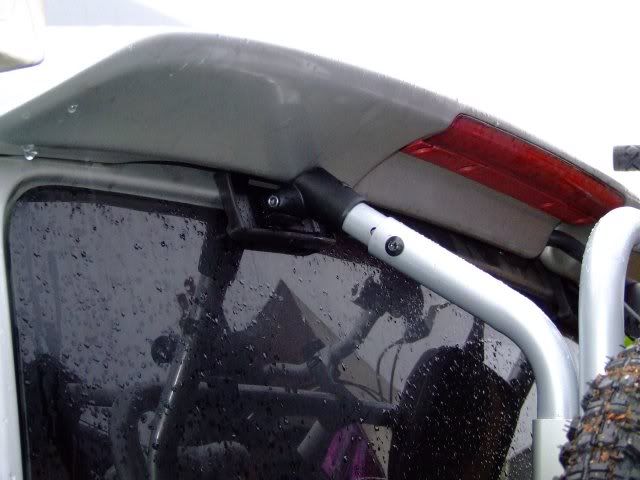
I've got the 18 fittings, and I'm sure I followed the settings for a VW T4/T5 for mine (I've got a 2001 ford freda with spoiler). You might want to adjust the thin metal strips then, that latch onto the top of the boot, to determine where you want the rubber pads to sit- i.e either half on the rear windscreen half off- like 'Muzorewa' or fully onto the windscreen.
I've got mine on the windscreen, however I'm guessing there could be some concerns with allowing all the weight on the glass eventually. To be honest, I put mine on in a hurry and will probably re-adjust it to sit like 'Muzorewa's.
Re: Fitting instructions for Thule 973 bike rack
Posted: Wed Mar 09, 2011 10:39 am
by LoopyLoo
Hiya
I can take some photos of mine if that would help, but its more or less the same as Muz's.
It was really trial and error. I put the rubber bits half onto the glass and half off (like Muz), as this way is the only way you'll get to keep the spoiler. I think (but don't quote me) that we ended up with 14 or 15 holes 'showing' on the thin metal strips that go over the top of the door (hopefully you understand what I mean!).
On the 'curved' upper pieces you can see on muz's first photo, that he's used the second 'hole' along (as there is half a hole showing), on ours though we used the third hole along so we have 1.5 holes showing. Hopefully that makes sense too.
It took us hours to do it, as it was on and off a lot whilst we made adjustments. None of it really made sense until we made a start then it fell into place.
Lou