Fitted Scavenger Fan over-ride switch :-)
Posted: Mon May 05, 2008 11:46 pm
Well blow me down I did it and it was eezy peezy.
I put the Bongo on ramps for easy access and identified 2 wires from main harness feeding to removable plug on front of scavenger fan, easily accessed when vehicle was on ramps. One wire is black, the other green/yellow. There are markings on the mating face of the connector plug that show + and - to confirm that black wire is negative and green/yellow wire is positive. I cut both though found I only needed to have cut the green/yellow positive wire. I spliced a fresh feed to come direct from the main battery vie a fused dashboard switch. Circuit is fused at 15 amps as I had a switch, wiring and 15amp fuse from the spotlight kit I bought but that weren't needed. As I didn't have a spare relay I opted to wire the fan direct with the 15amp fuse. If it blew, I would know wiring etc. was under-rated. It seems to run fine, wires cool so reckon its OK. The theory is that the scavenger sensor driven wiring is still live so the fan should kick in as per design, but I can opt to fee power direct from the dash switch and decide for myself when I would like to remove heat (and any fumes) from the engine compartment. I reckon I don't need an ignition only feed as the fan is easy to hear once the engine is stopped and you exit the vehicle so very unlikely you'd forget to turn it off, and this way it is available for use whenever you choose. Interestingly, the fan is almost impossible to hear once in the vehicle with engine running, and the same when outside it except when standing in front of the vehicle, when it can just be heard.
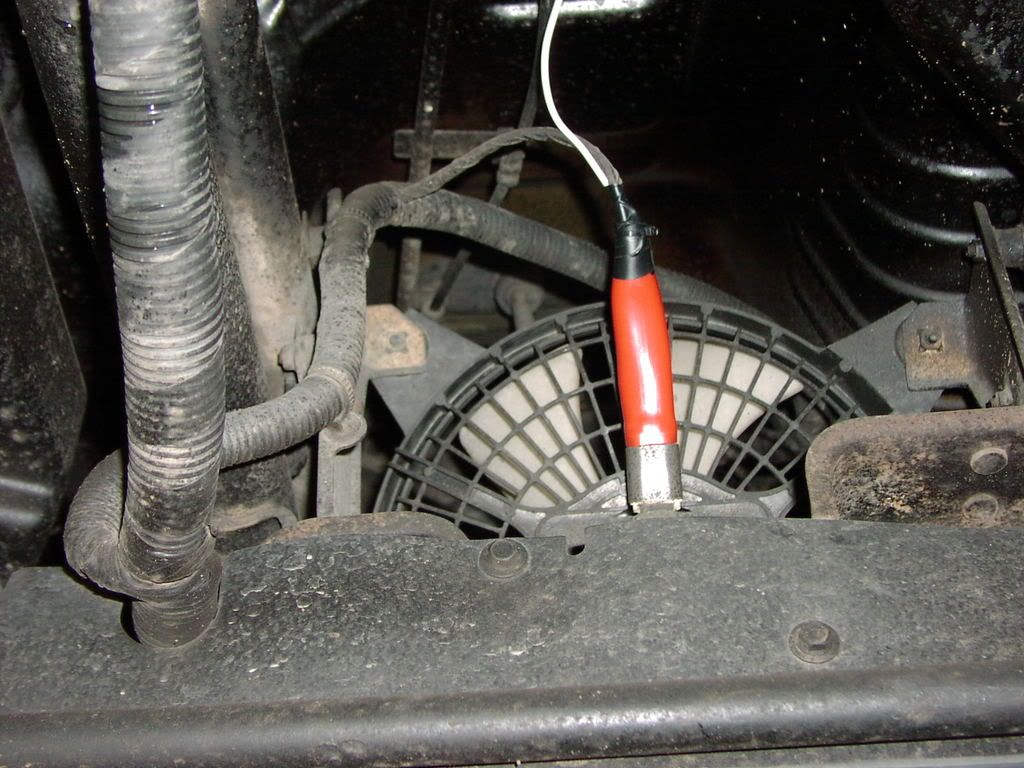
As I had used screwblock connectors to remake the wiring by the scavenger fan connector and because these were bulky, I sheathed the wiring and connectors with some good quality plastic sheathing that stretched and slid nicely over the plug. I bound the other end closed with insulating tape and then put a cable tie tight over the ending of the tape winding to hold it in place and keep the plastic sheath closed. Made for a neat installation. Here's couple of clickable thumbnails (the white wire is the live feed from the blue illuminated switch on the dash).


I put the Bongo on ramps for easy access and identified 2 wires from main harness feeding to removable plug on front of scavenger fan, easily accessed when vehicle was on ramps. One wire is black, the other green/yellow. There are markings on the mating face of the connector plug that show + and - to confirm that black wire is negative and green/yellow wire is positive. I cut both though found I only needed to have cut the green/yellow positive wire. I spliced a fresh feed to come direct from the main battery vie a fused dashboard switch. Circuit is fused at 15 amps as I had a switch, wiring and 15amp fuse from the spotlight kit I bought but that weren't needed. As I didn't have a spare relay I opted to wire the fan direct with the 15amp fuse. If it blew, I would know wiring etc. was under-rated. It seems to run fine, wires cool so reckon its OK. The theory is that the scavenger sensor driven wiring is still live so the fan should kick in as per design, but I can opt to fee power direct from the dash switch and decide for myself when I would like to remove heat (and any fumes) from the engine compartment. I reckon I don't need an ignition only feed as the fan is easy to hear once the engine is stopped and you exit the vehicle so very unlikely you'd forget to turn it off, and this way it is available for use whenever you choose. Interestingly, the fan is almost impossible to hear once in the vehicle with engine running, and the same when outside it except when standing in front of the vehicle, when it can just be heard.
As I had used screwblock connectors to remake the wiring by the scavenger fan connector and because these were bulky, I sheathed the wiring and connectors with some good quality plastic sheathing that stretched and slid nicely over the plug. I bound the other end closed with insulating tape and then put a cable tie tight over the ending of the tape winding to hold it in place and keep the plastic sheath closed. Made for a neat installation. Here's couple of clickable thumbnails (the white wire is the live feed from the blue illuminated switch on the dash).