Page 2 of 10
Re: Project - Retrim and new paint
Posted: Tue Nov 04, 2014 2:53 pm
by helen&tony
Hi
Oh, yes!!!!...when the device goes crunch and starts shrieking, you know you've reversed too far!...

Cheers
Helen
Re: Project - Retrim and new paint
Posted: Wed Nov 05, 2014 10:17 am
by Puma931
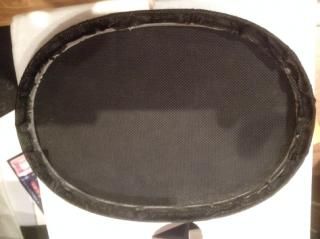
Speaker covers have been modified by removing the centre and replacing with acoustic cloth. Plus I'm fitting new quality speakers.

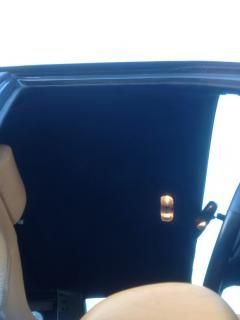
The headlining in the cabin has been fitted. The clips on the interior light needed some modification as the lining is thicker and the light would not stay in place.
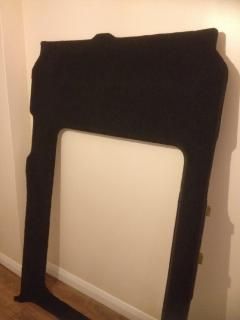
The rear headlining has been covered and this time I did not apply the fibreglass resin.
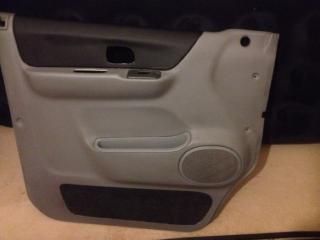
Not sure if I should leave the door card as is (need to change the speaker cover) or paint the grey matt black?
Tonight I'll be fitting the rear headlining and some of the interior panels.
That is it for now.
Re: Project - Retrim and new paint
Posted: Wed Nov 05, 2014 1:59 pm
by Simon Jones
What kind of paint are you using on the plastic/vinyl trim & is it hardwearing? I've seen a few DIY paint jobs that look fine initially but go decidedly manky once they get scuffed.
Re: Project - Retrim and new paint
Posted: Wed Nov 05, 2014 3:12 pm
by helen&tony
Hi Simon
I painter my dashboard around 9 years ago..no marks!...Our rather massive German Shepherd tried getting through the windscreen in search of a cat sandwich, with no marking. The paint to use is the stuff from the local auto paint factors, and it's bumper paint for plastic bumpers...You can buy it in aerosols, mostly, and it's a multi-stage operation.
First I cleaned the area to be painted with thinners (lightly), to take the old surface off a bit, then used their proprietary cleaner..Mine needed doing after the removal of the usual Japanese gadget brackets!...
As you rightly say, anything else comes off!
Cheers
Helen
Re: Project - Retrim and new paint
Posted: Wed Nov 05, 2014 3:19 pm
by Puma931
I used Halfords plastic primer and then Halfords matt black. Each panel uses 1 can of each so it is not cheap to do.
Re: Project - Retrim and new paint
Posted: Wed Nov 05, 2014 3:38 pm
by Puma931
Did you remove your dash when you painted it?
helen&tony wrote:Hi Simon
I painter my dashboard around 9 years ago..no marks!...Our rather massive German Shepherd tried getting through the windscreen in search of a cat sandwich, with no marking. The paint to use is the stuff from the local auto paint factors, and it's bumper paint for plastic bumpers...You can buy it in aerosols, mostly, and it's a multi-stage operation.
First I cleaned the area to be painted with thinners (lightly), to take the old surface off a bit, then used their proprietary cleaner..Mine needed doing after the removal of the usual Japanese gadget brackets!...
As you rightly say, anything else comes off!
Cheers
Helen
Re: Project - Retrim and new paint
Posted: Wed Nov 05, 2014 3:45 pm
by helen&tony
Hi
No, I removed only the bits I didn't want to paint in the binnacle...The lower dash was fine...only the dark top part, and the centre of the light grey part, where various mobile 'phone doo-dahs had been fitted.
It was a LOT of masking!, and no lines are visible!
Are you using bumper paint?
Cheers
Helen
Re: Project - Retrim and new paint
Posted: Wed Nov 05, 2014 6:43 pm
by Puma931
Plastic primmer (which is the stuff used for bumpers) and then normal matt black. Once fully dried (primmer takes some time to dry) it is fine.
I'll take care masking as I don't think I'll remove my dash.
helen&tony wrote:Hi
No, I removed only the bits I didn't want to paint in the binnacle...The lower dash was fine...only the dark top part, and the centre of the light grey part, where various mobile 'phone doo-dahs had been fitted.
It was a LOT of masking!, and no lines are visible!
Are you using bumper paint?
Cheers
Helen
Re: Project - Retrim and new paint
Posted: Wed Nov 05, 2014 7:42 pm
by helen&tony
Hi
Masking took hours...I seem to remember it took about 3 or 4 hours . Previously I cleaned, then masked, then used a pre-cleaner which leaves the surface tacky for a primer, and the primer bonds to the plastic, then a paint layer, which is a flexible paint , so that it won't flake or crack. The whole thing is a 3-part kit, only available from a paint supplier who has access to specialist supplies...usually an auto trade supplier will have this stuff, but they are strictly trade suppliers/ merchants. The whole process took a long time, and I left it to settle and harden properly...on a series of very warm days. Since doing that, I fitted a wooden dash (Original accessory ), but as with all modern stuff, it's only a simulated wooden dash which I had made in Japan, and as with most of the original accessories, they can still be had, at made to order prices!
Cheers
Helen
Re: Project - Retrim and new paint
Posted: Tue Nov 11, 2014 11:47 am
by Puma931
Glove box trimmed in vinyl, carpet inside and plastic painted black.
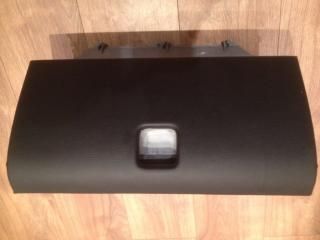
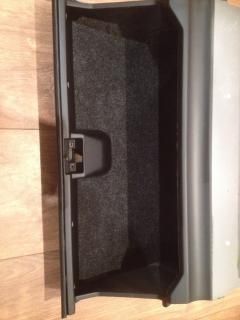
Just need to paint where the handle goes and then fit the handle and latch.
I also painted the bits of the dash that you can remove and the next stage is to prep and paint the dashboard...
Re: Project - Retrim and new paint
Posted: Fri Nov 14, 2014 2:17 pm
by Puma931
Doing the floor this weekend in ply plus this lino.

Should add some colour to the black interior.
Re: Project - Retrim and new paint
Posted: Thu Nov 20, 2014 11:20 am
by Puma931
Removed the blinds last night, and have bought some blackout material to replace the old material.
Just hope the refitting them will go smoothly......
Busy weekend coming up and I'll post some more pictures on progress.
Re: Project - Retrim and new paint
Posted: Thu Nov 20, 2014 11:30 am
by the.sasquatch
Really doing a cracking job

giving me plenty of ideas
Re: Project - Retrim and new paint
Posted: Thu Nov 20, 2014 11:55 am
by Dr Fingers
This is gonna be a stunner

Derek
Re: Project - Retrim and new paint
Posted: Fri Nov 21, 2014 10:48 am
by Spencer54

get the pics up!


