Page 2 of 2
Re: Boarding The Floor
Posted: Tue Dec 02, 2014 11:34 am
by Dodgey
You need to trim the upper outer edges of the step and then it will fit back on. Then you put the same ply under the bottom of the step so it has something to rest on and fix to.
I did a full step by step on here but it got deleted somehow ( a full conversion from start to finish)


Spencer54 wrote:OK i'm all done - with the exception of the step, that seems to be the stumbling block.
Now its so much higher it doesn't want to go back on.
Anyone else have that problem?
Or if you have a hard floor can you show me a pic of how its done?
Re: Boarding The Floor
Posted: Tue Dec 02, 2014 1:45 pm
by Spencer54
I think I'm almost there - I had a go this weekend but I was put off by being able to see the ply or at least the metal of the base of the original step.
Looking at yours, you can see that - so maybe mines right.
How much of the lip did you trim off mine seems high and that the door for where the Jack lives looks like it won't go on.
Now that everything is now 24mm higher (2x12mm ply).
Have I ballsed up putting it that high?
Re: Boarding The Floor
Posted: Thu Dec 04, 2014 5:51 pm
by Dodgey
In a word, yes

- Well, sort of, you will be able to find a solution.
I used one sheet of ply (can't remember the thickness). Cetainly not two. My ply rested on ply offcuts but this only raised it a little as teh offcuts sat in the depressions in the floor.
When I trimmed the step It was the top outer edges I had to cut back a little, as raising the step just meant it would no longer fit. I also remember having to remove all of the plastic "webbing" on the underside of the plastic step as this was in the way too. None of it was tricky, especially with an electric finger file which makes short work of it.
Having the metal step visible (and the ply underneath) is a non issue. You wont' notice it or look at it ever again!
Re: Boarding The Floor
Posted: Thu Dec 04, 2014 9:31 pm
by Spencer54
Ive used a grinder and taken the webbing off the bottom - so hopefully that'll lower it a bit.
Toying with taking some off the lip as well.

Re: Boarding The Floor
Posted: Fri Dec 05, 2014 12:32 pm
by Dodgey
Spencer54 wrote:Ive used a grinder and taken the webbing off the bottom - so hopefully that'll lower it a bit.
Toying with taking some off the lip as well.
That rings bells to me. I may have done that too.
Re: Boarding The Floor
Posted: Wed Dec 10, 2014 2:52 pm
by Spencer54
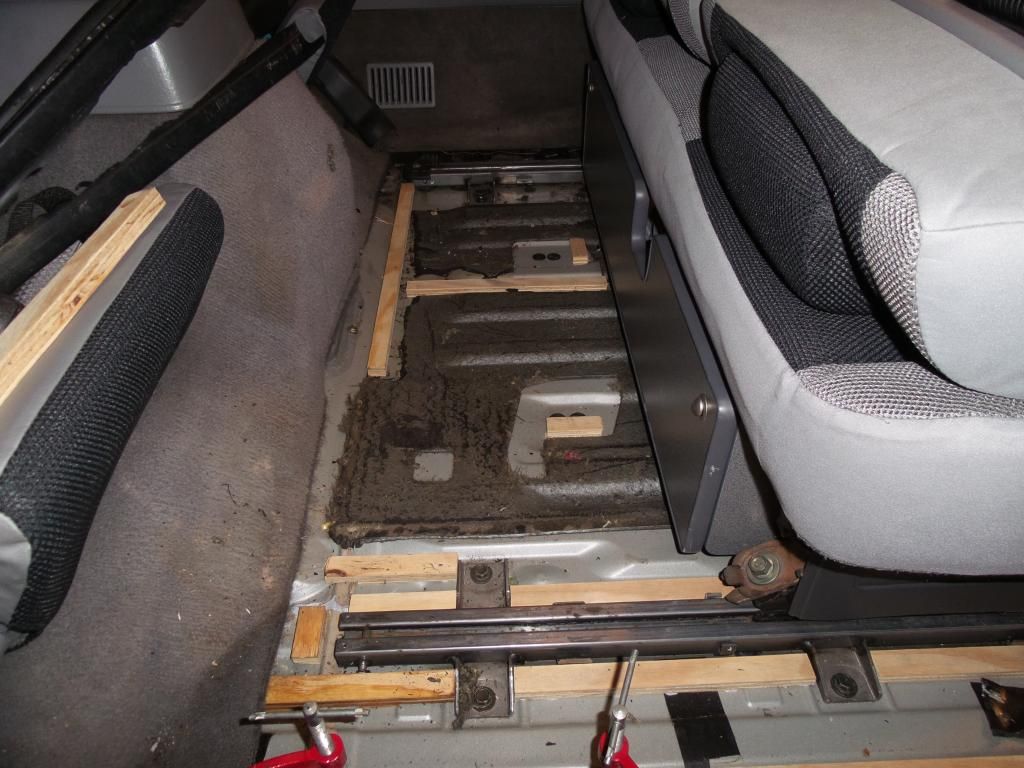
Step on but door seems to be not shutting 100% and I can see daylight at the bottom seal - so I've missed something or the step is too proud.
Grinding off the webbing worked a treat and the height is now spot on though.
Re: Boarding The Floor
Posted: Fri Jan 02, 2015 6:21 pm
by Mark Elvin
Can anybody remember how much ply they bought to di their floor? Just started on the strip down today ready for flooring & re-spray.
Re: Boarding The Floor
Posted: Fri Jan 02, 2015 7:47 pm
by billymansell
An 8' x 4' sheet will do the floor with the offcuts used for some of the under-floor blocks as two thicknesses of blocks required for a level floor.
I had the diy shop cut the board in half so I could transport it.
Re: Boarding The Floor
Posted: Mon Jan 19, 2015 4:34 pm
by Mark Elvin
Actually started mine at the weekend, cutting lots of 15mm thick packers to go in the lower ribs of the floor.
I had 1/2 a large sheet of 15mm cut into 25mm wide strips, I just use the tenon saw to cut then to length. Where the small high points are I saw down through a ply or two the chisel out the ply to clear.
Re: Boarding The Floor
Posted: Tue Jan 20, 2015 7:37 am
by Mark Elvin
I'll update the thread with my experiences of doing my floor, currently a work in progress.
25mm wide x 15mm thick marine ply strips bonded to low points of floor using Sikaflex.
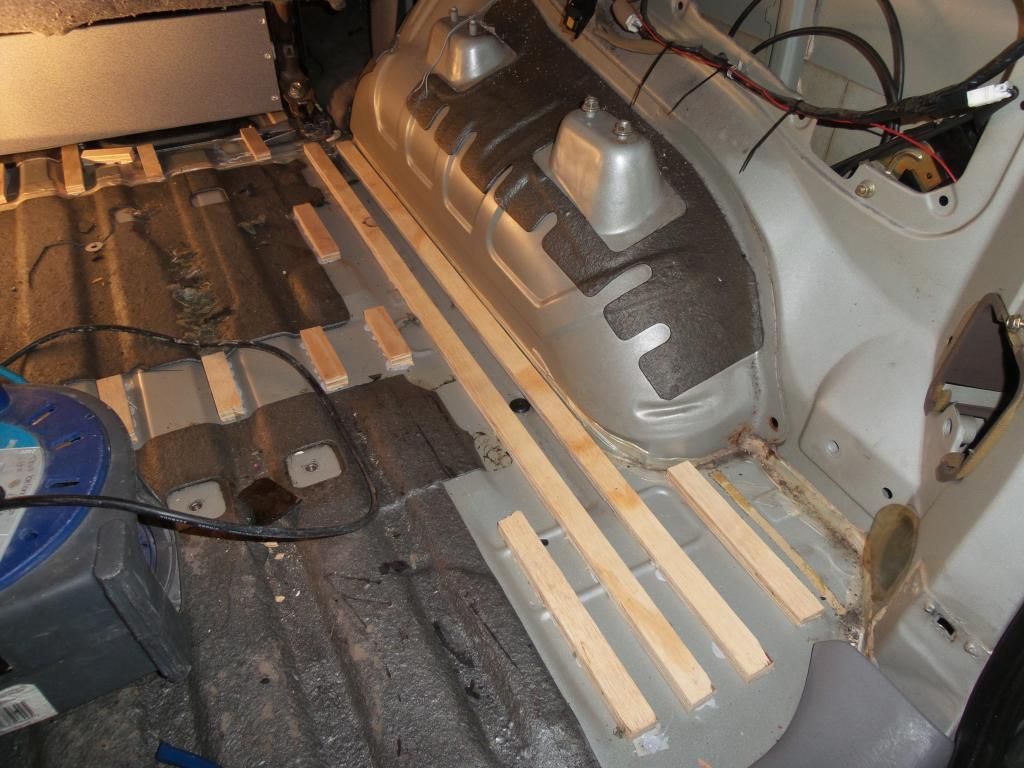
Notched out to clear the ridges in some of the low points.
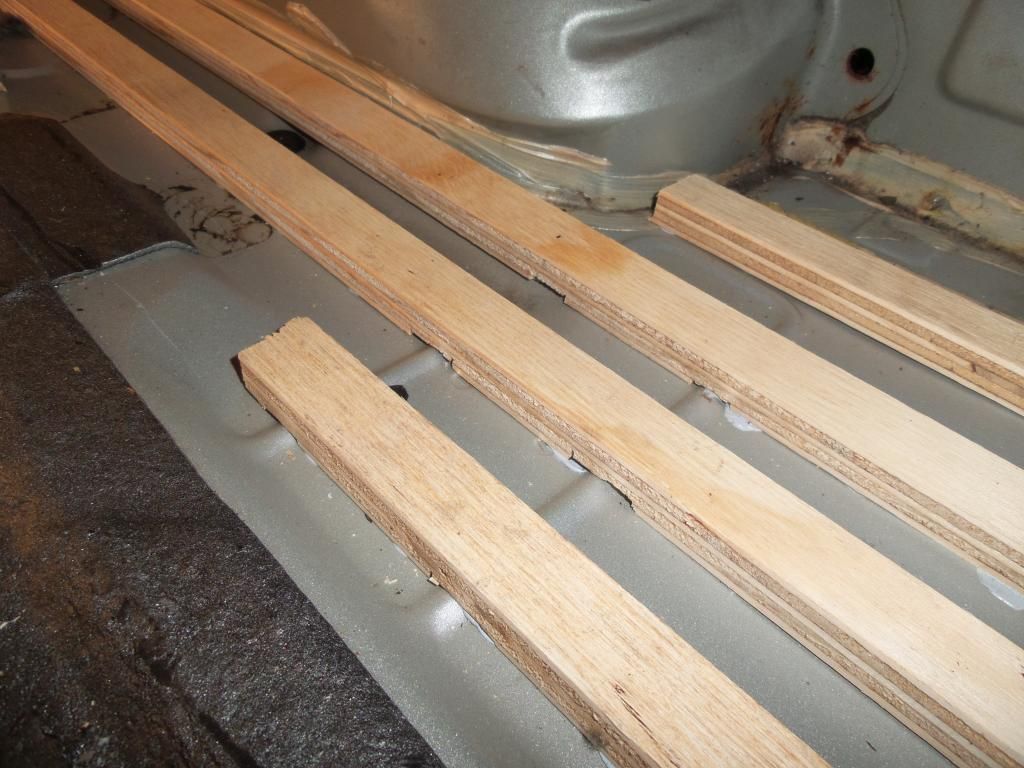
Same in the front area of floor. Some of the tar based insulation had to be scraped away to give a flat surface.
Along the step edge I clamped the baton & the step lip together to ensure a good bond. May pop a couple of small dome headself tappers in from underneath also as this area of the floor is largely unsupported.
Re: Boarding The Floor
Posted: Tue Jan 20, 2015 6:39 pm
by daveblueozzie
Think about leaving a hatch to get to the fuel tank, earth wire problems or even sender unit, easier than dropping the tank.
Re: Boarding The Floor
Posted: Tue Jan 20, 2015 8:45 pm
by dobby
And it's got to be worth waxoyling the arches before the trim panel goes on?
Re: Boarding The Floor
Posted: Tue Jan 20, 2015 9:27 pm
by Gasy
^^^^^
Just what I was thinking as I was looking at them pics
Easy to do inside and in all them little holes
I've just used some interior stuff from lidl/aldi that was good really runny came with a 10" straw
Made by MAGNUS
Re: Boarding The Floor
Posted: Wed Jan 21, 2015 7:26 am
by Mark Elvin
daveblueozzie wrote:Think about leaving a hatch to get to the fuel tank, earth wire problems or even sender unit, easier than dropping the tank.
It's straight in the body shop after the floor is down to get the arches done, refitting the trim is being done after the arches are sortaed for this very reason!

dobby wrote:And it's got to be worth waxoyling the arches before the trim panel goes on?
I already have a TIG welded picture frame to go around the removable hatch made up.
Re: Boarding The Floor
Posted: Mon Jun 22, 2015 10:04 pm
by dannyn
Just started this, stripped out the van, removed the blinds so the Boss can put blackout fabric on.
Now to start the flooring, but first it needs to go see my mechanic friend for some sticking plasters after being nibbled by t

he tin worm


